Shopify Integration
Doover offers the abilty to integrate a new or existing Shopify store with your Doover organisation.
Benefits include:
- Shopify payment processing managed through your existing Doover Stripe account
- Shopify orders can be linked to and provisioned through Doover
- Doover can display your products as "ads" in the Doover app.
Getting Started
This guide will walk you through the steps to integrate your Shopify store with Doover. It should take less than an hour.
Prerequisites
- A Shopify shop (must be on a Basic (or higher) plan, with admin access
- A Doover account, also with admin access for your organisation.
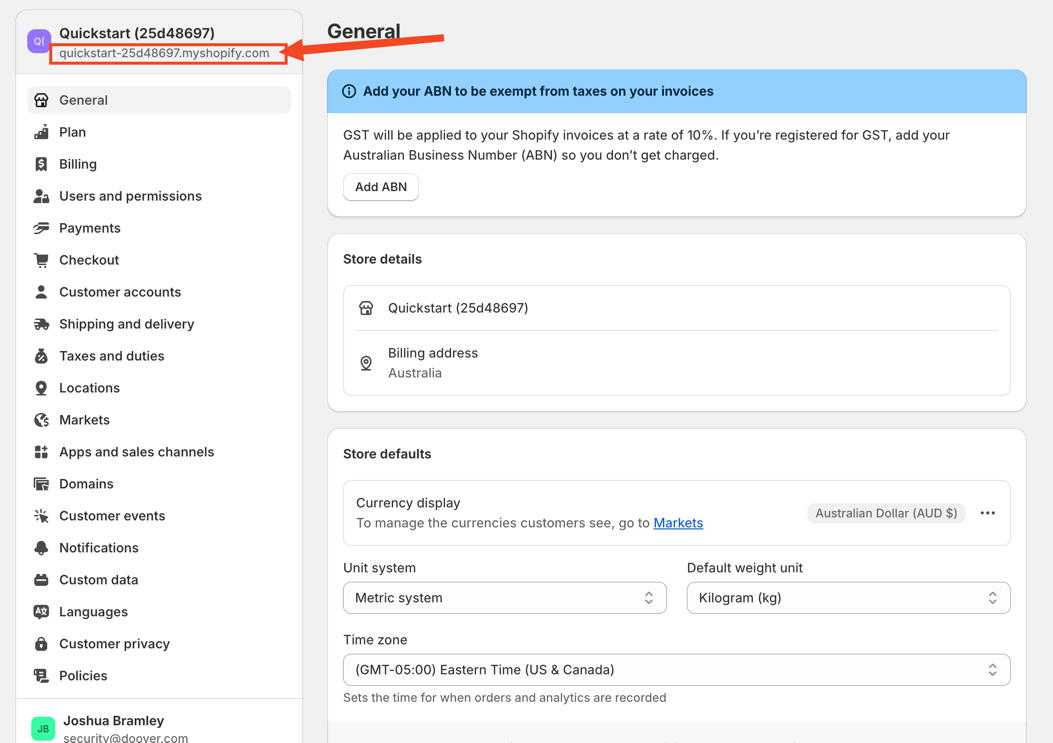
Step 1: Retrieve your shopify domain
This step may be slightly different depending on your store setup.
Either way, a shopify domain should take the form of:
xxxxxx.myshopify.com
There are a few ways of finding your shopify domain:
- If you haven't set a custom domain, the domain can be found in the top left corner of the Shopify Admin Page.
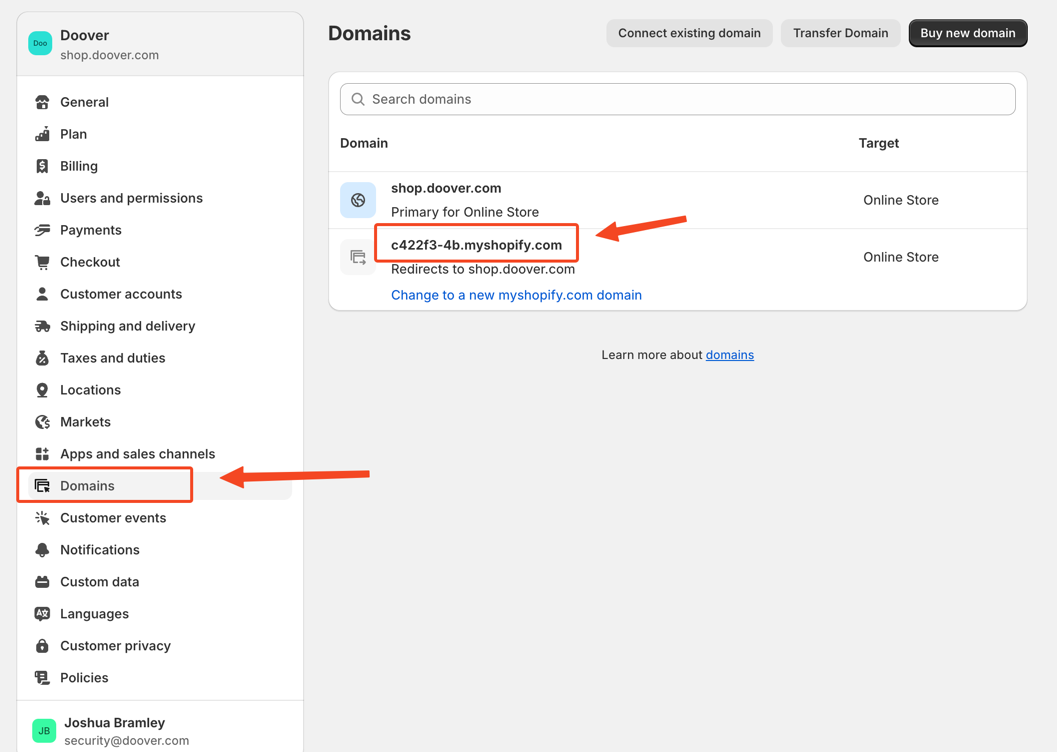
- If you have set a custom domain, you can find the shopify domain by navigating to the "Domains" tab in the Shopify Admin Page:
- If you're still unsure, reach out to the Doover team.
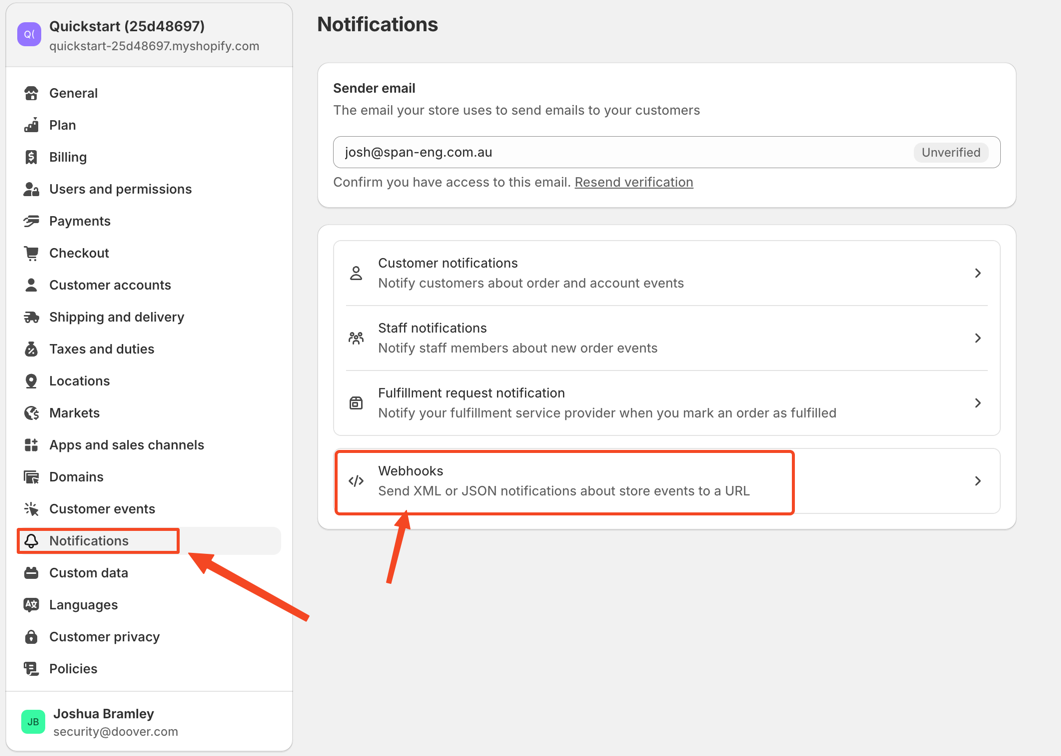
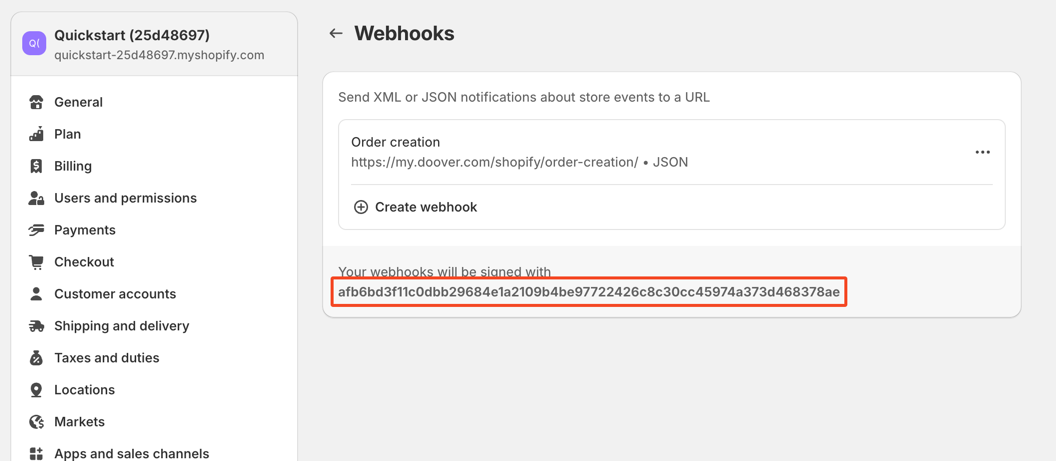
Step 2: Create a Webhook Notification
Next, we're going to create a new webhook notification. This allows Doover to be notified whenever a customer places an order so that we can add the order to the customer's Stripe invoice.
The event we're looking for is an Order creation, you need to point the webhook URL to https://my.doover.com/shopify/order-creation (NOT your own customer site), and select the 2024-07 version of the API.
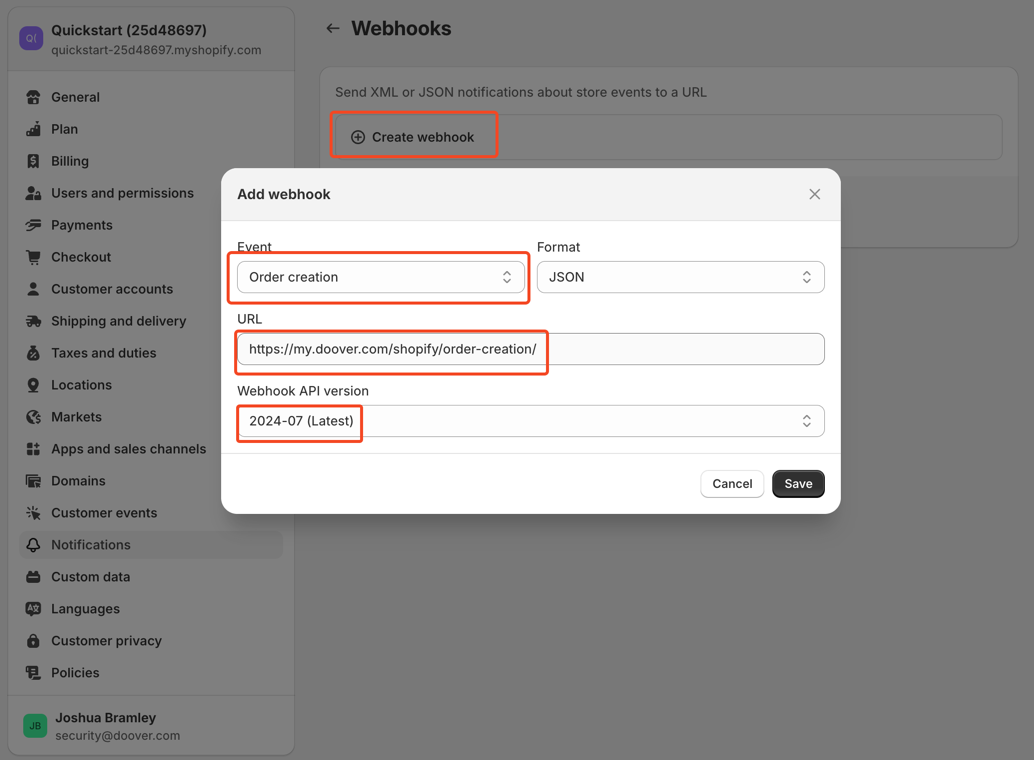
Finally, take note of the "Webhook Signing Key", as we will enter this later on the Doover site.
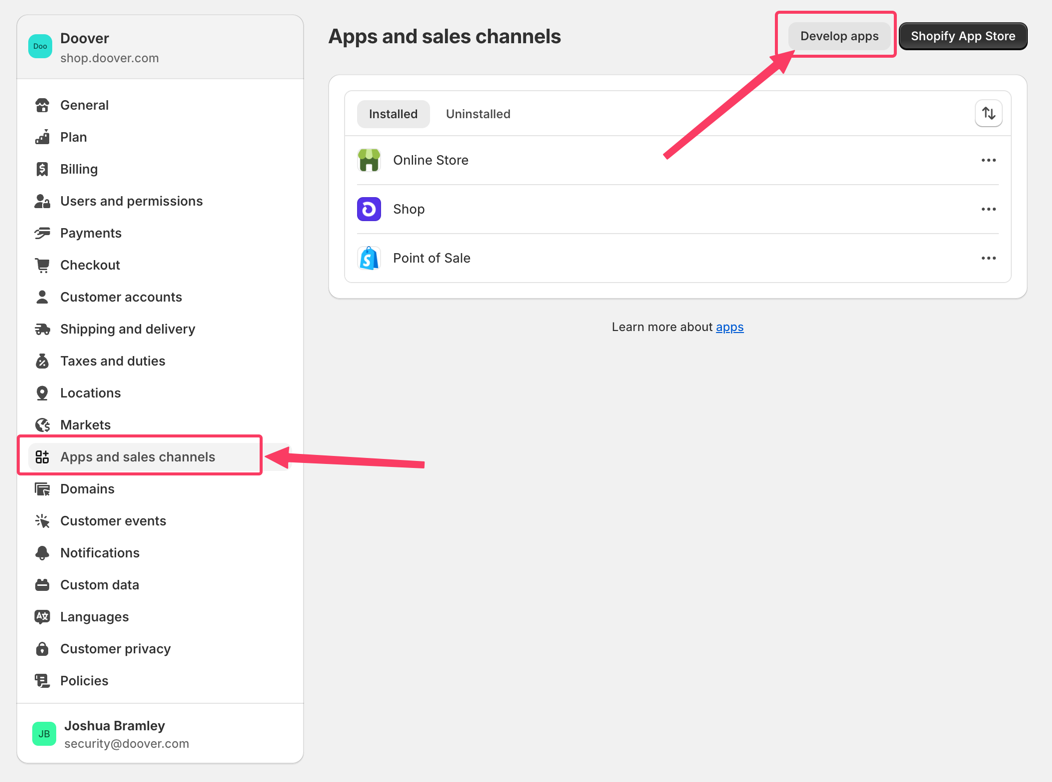
Step 3: Create a Shopify App
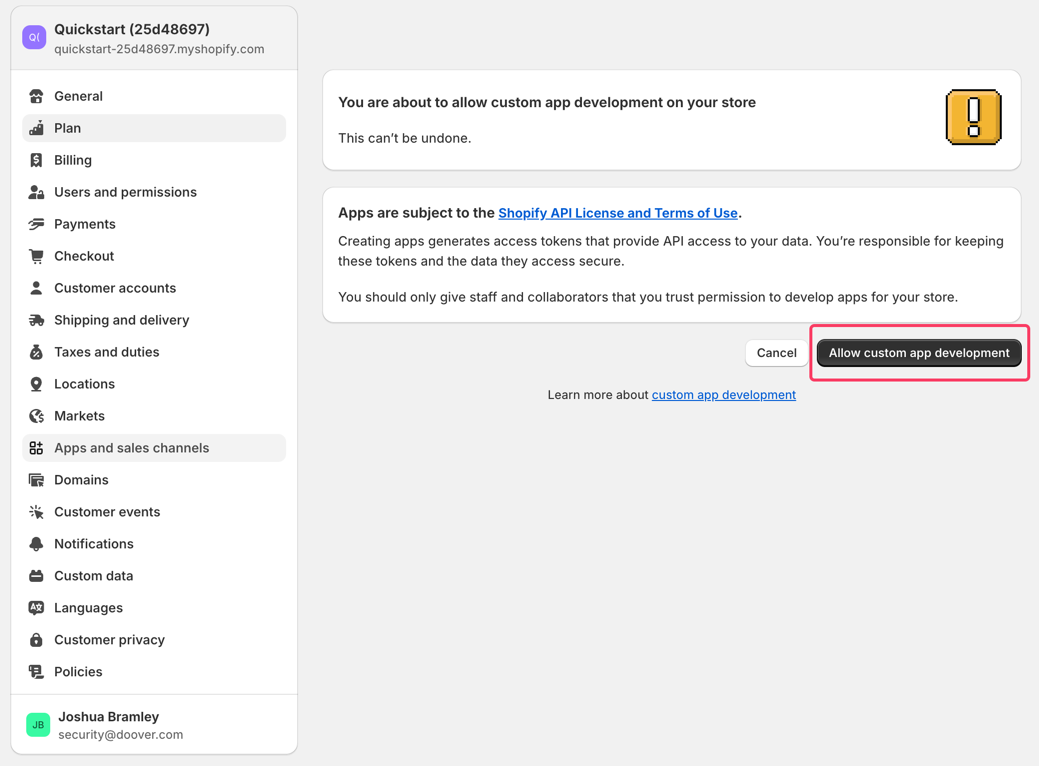
You may need to allow custom app development 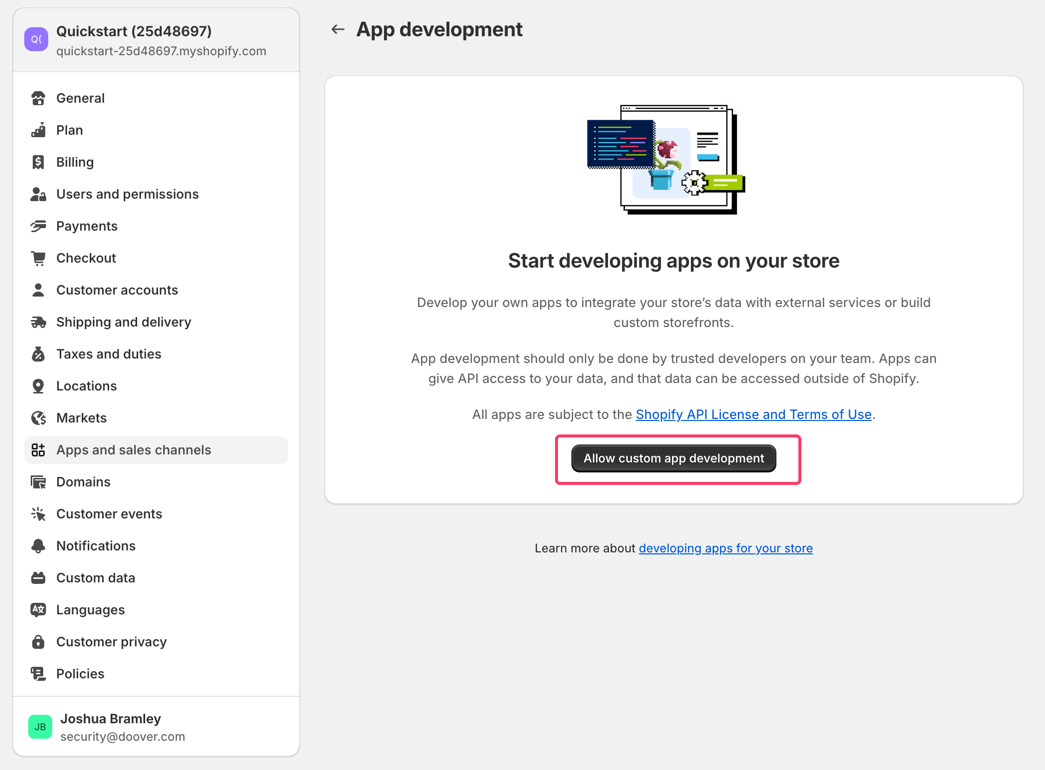
Next, create a new app: 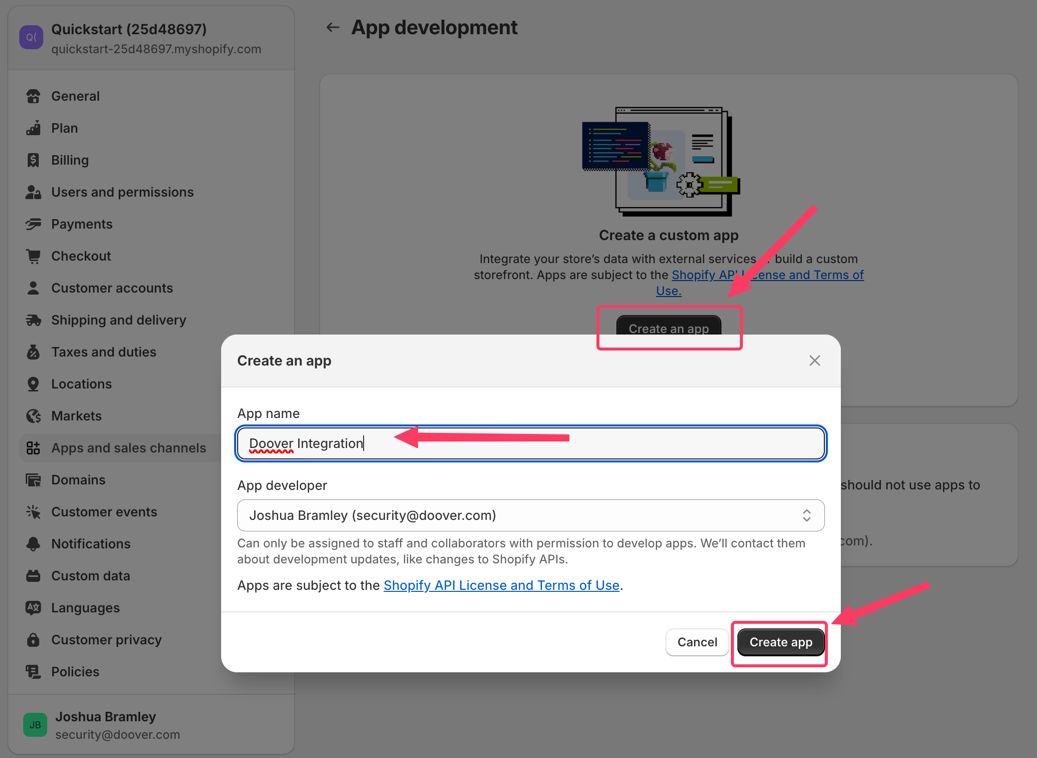
Step 4: Configure API permissions
Next, we're going to configure some API credentials. This is necessary for Doover to manage orders for you (assigning tags, etc.), and to access products for Ad display.
We'll start off with the Admin API Integration. 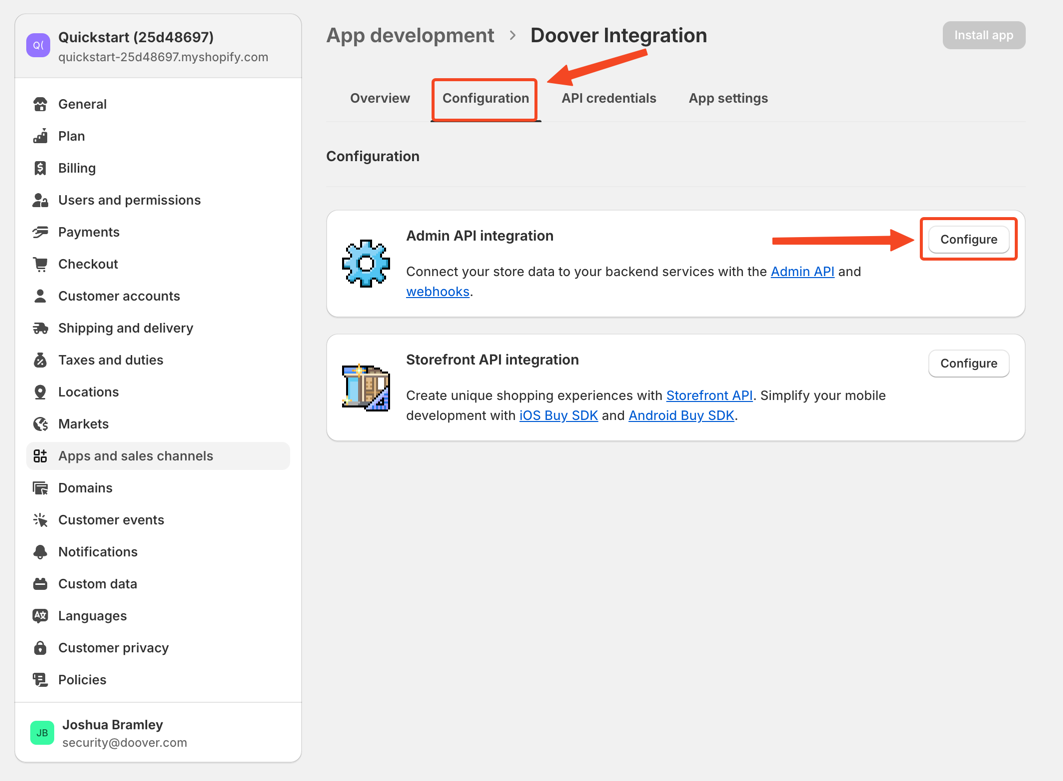
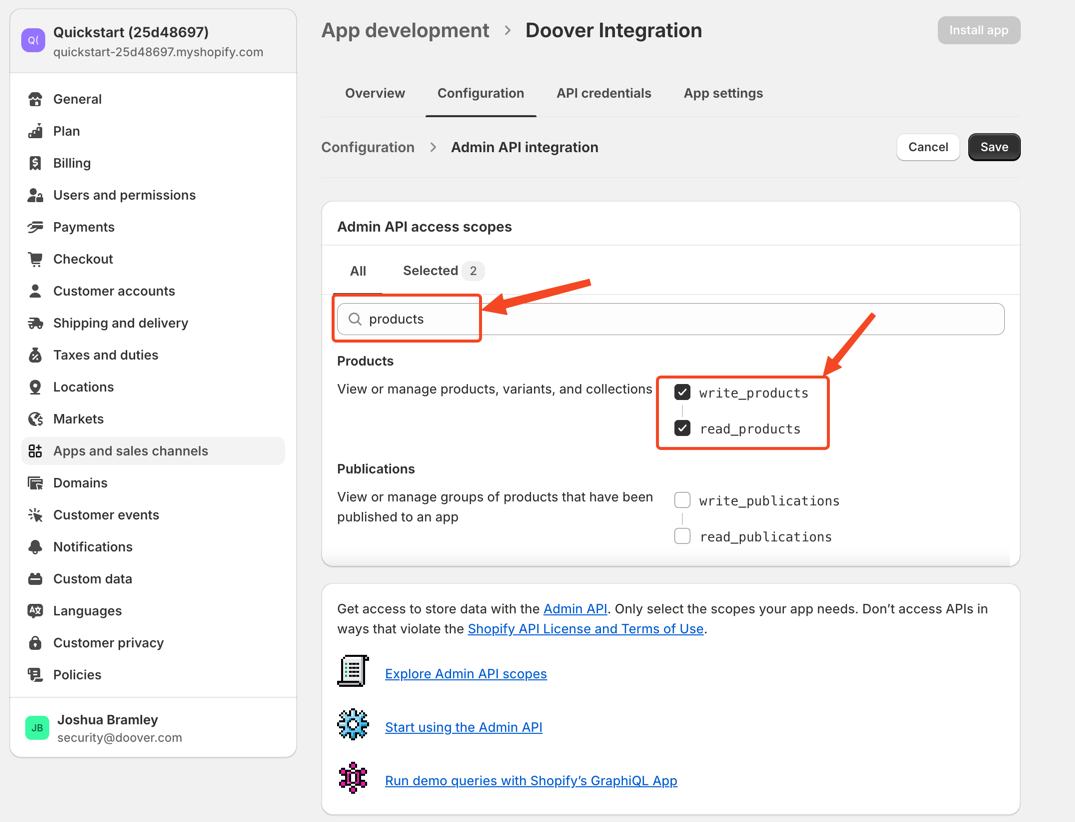
Firstly, allow write_products and read_products permissions. You'll also need to allow read_orders and write_orders permissions.
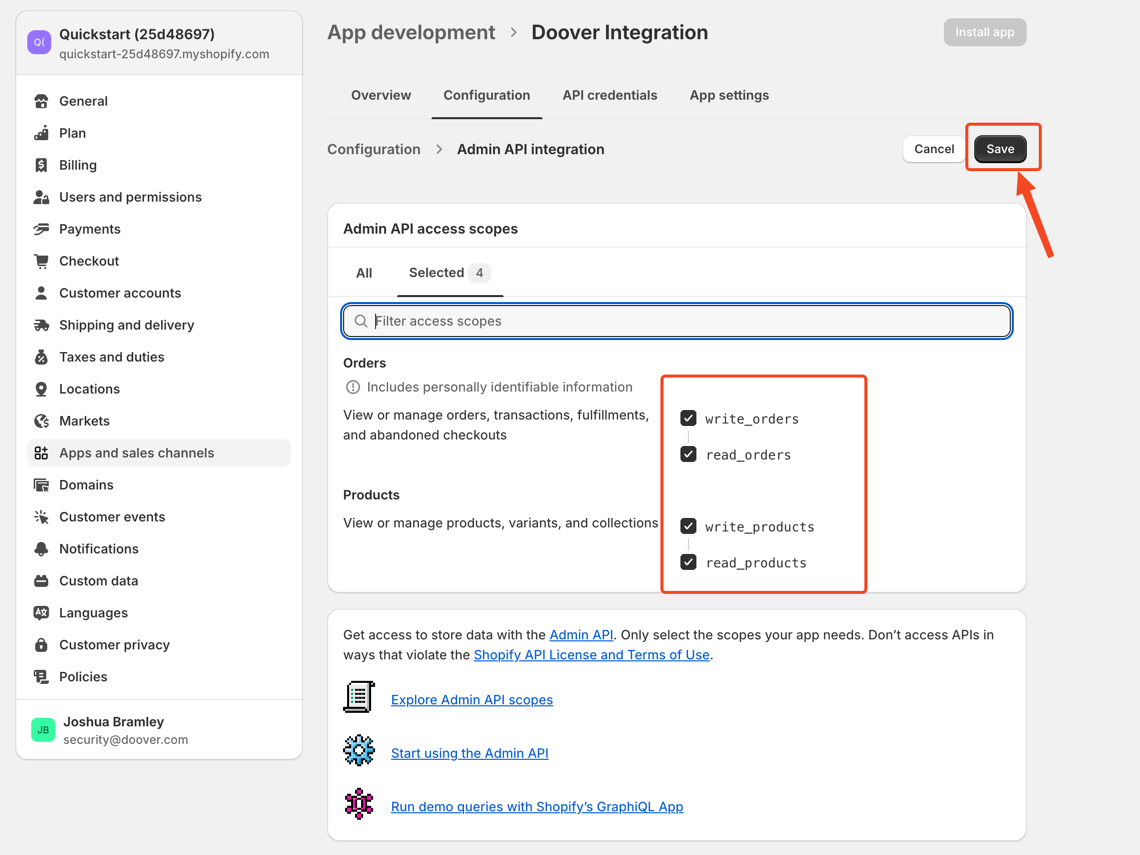
The Selected page should show 4 permissions selected. You can now save, as shown below.
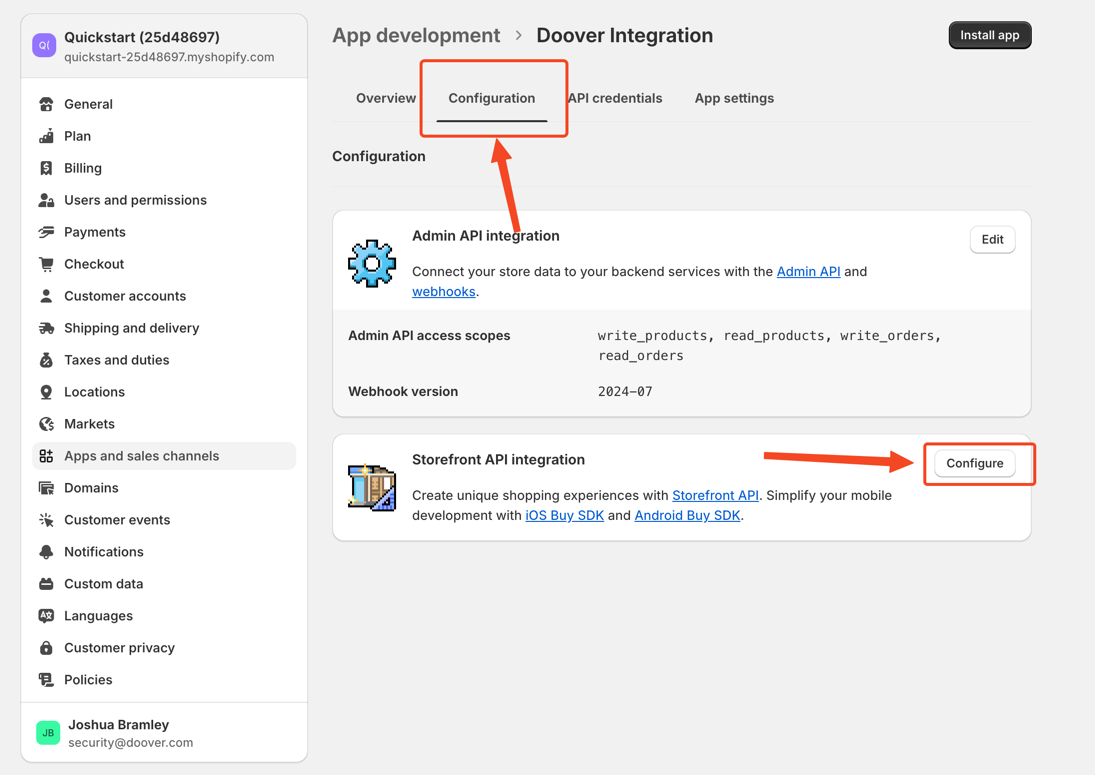
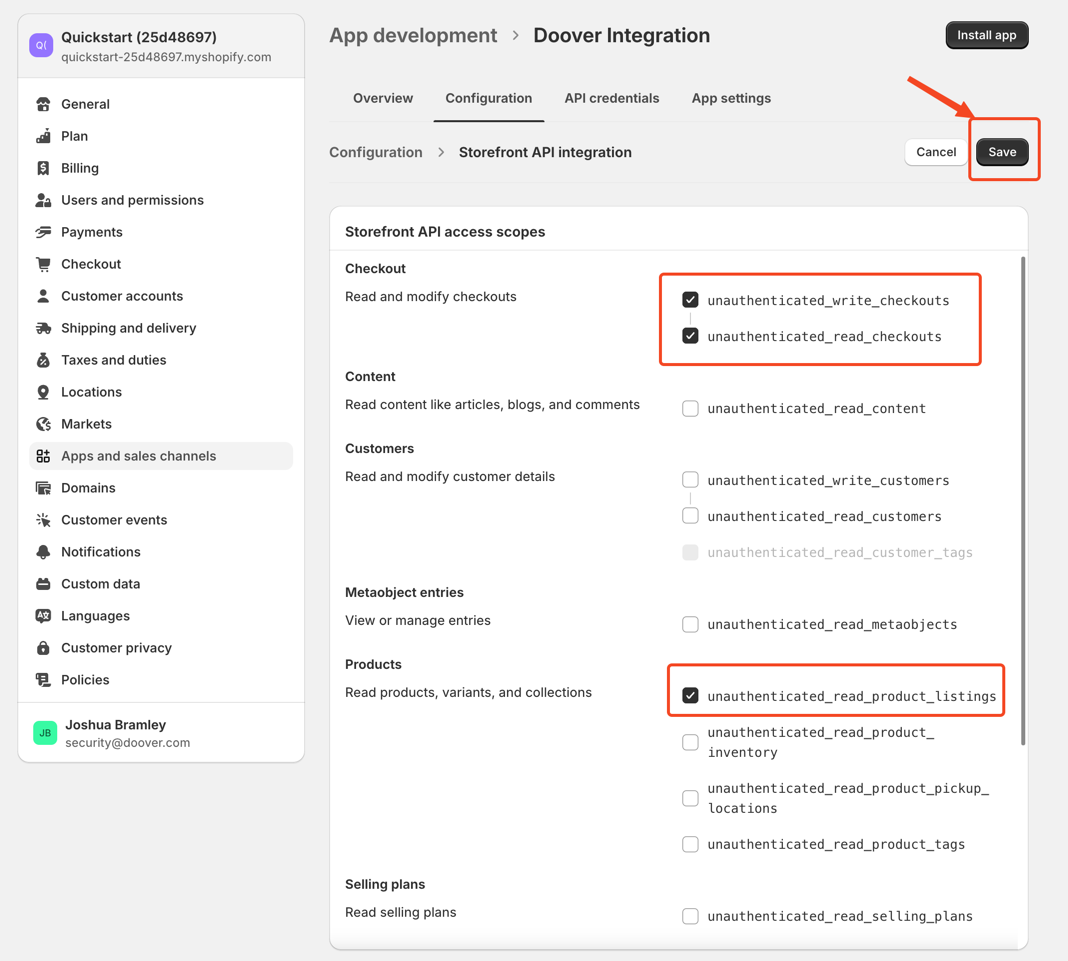
Next, we're going to configure the Storefront API Integration. This is necessary for Doover to display your products as ads.
You should allow access for unauthenticated_write_checkouts, unauthenticated_read_checkouts, and unauthenticated_read_product_listings.
You should now see the following permissions granted on the "Configuration" tab. 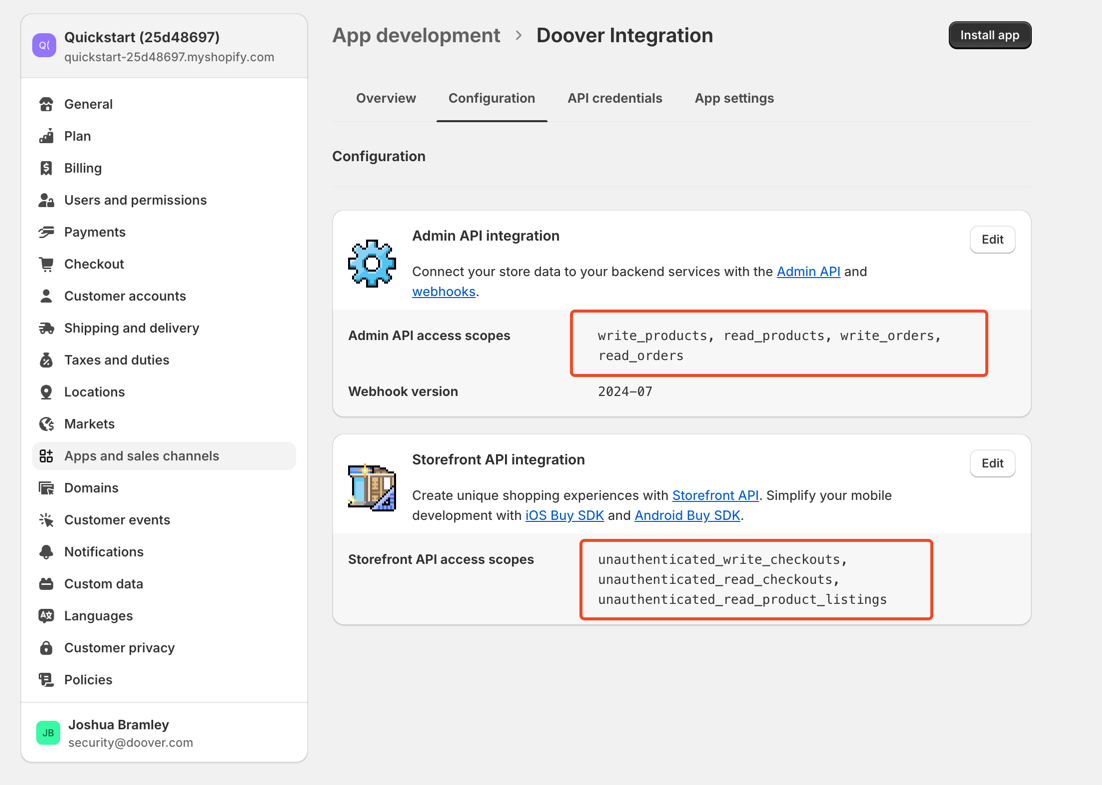
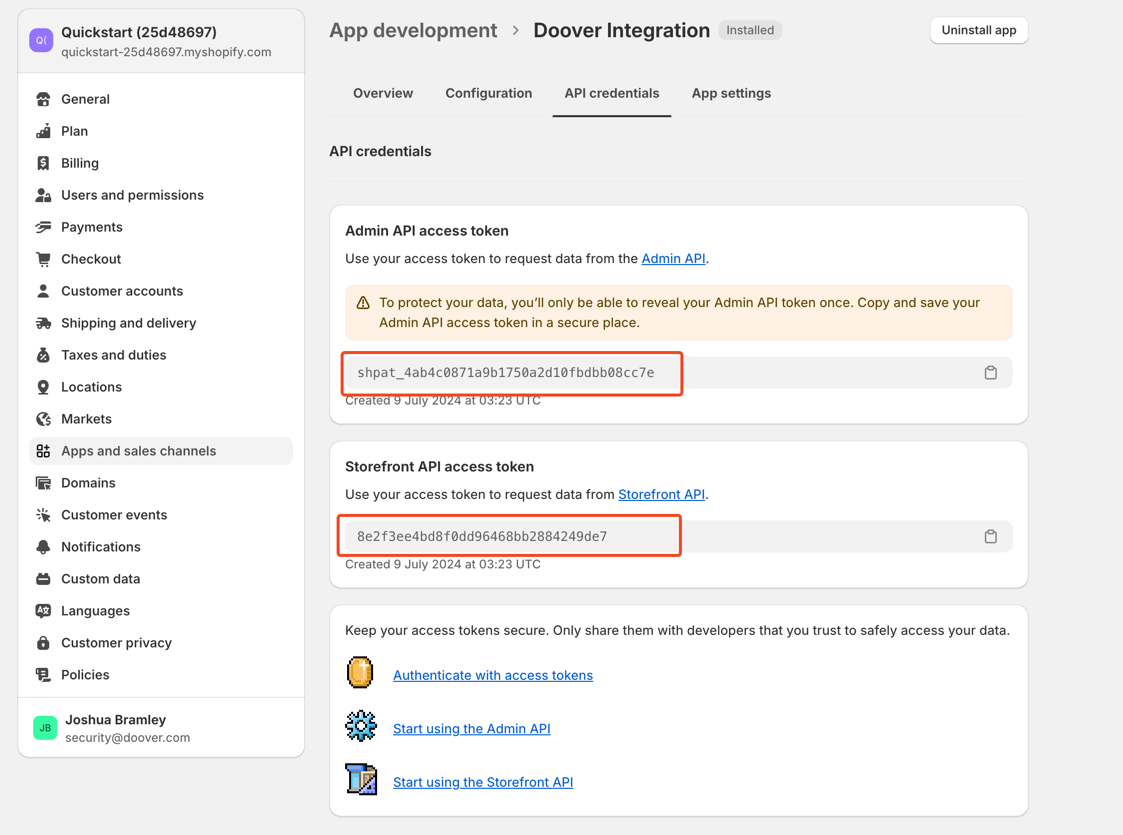
Step 5: Installing the App and retrieving API tokens
Before going any further, we now need to install the app. This doesn't do much, but it does allow us to generate API tokens that we need.
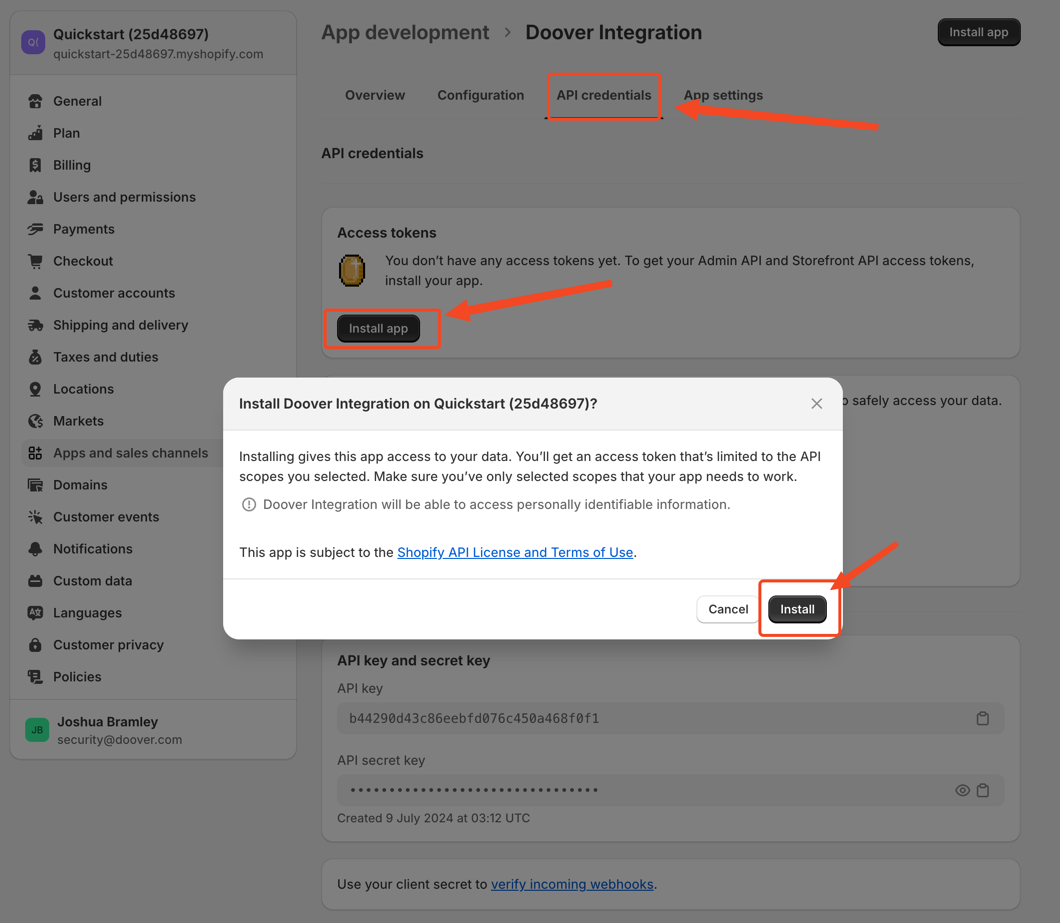
You should now be able to click "Reveal Token Once" and see the following screen. DO NOT LEAVE THIS PAGE!!
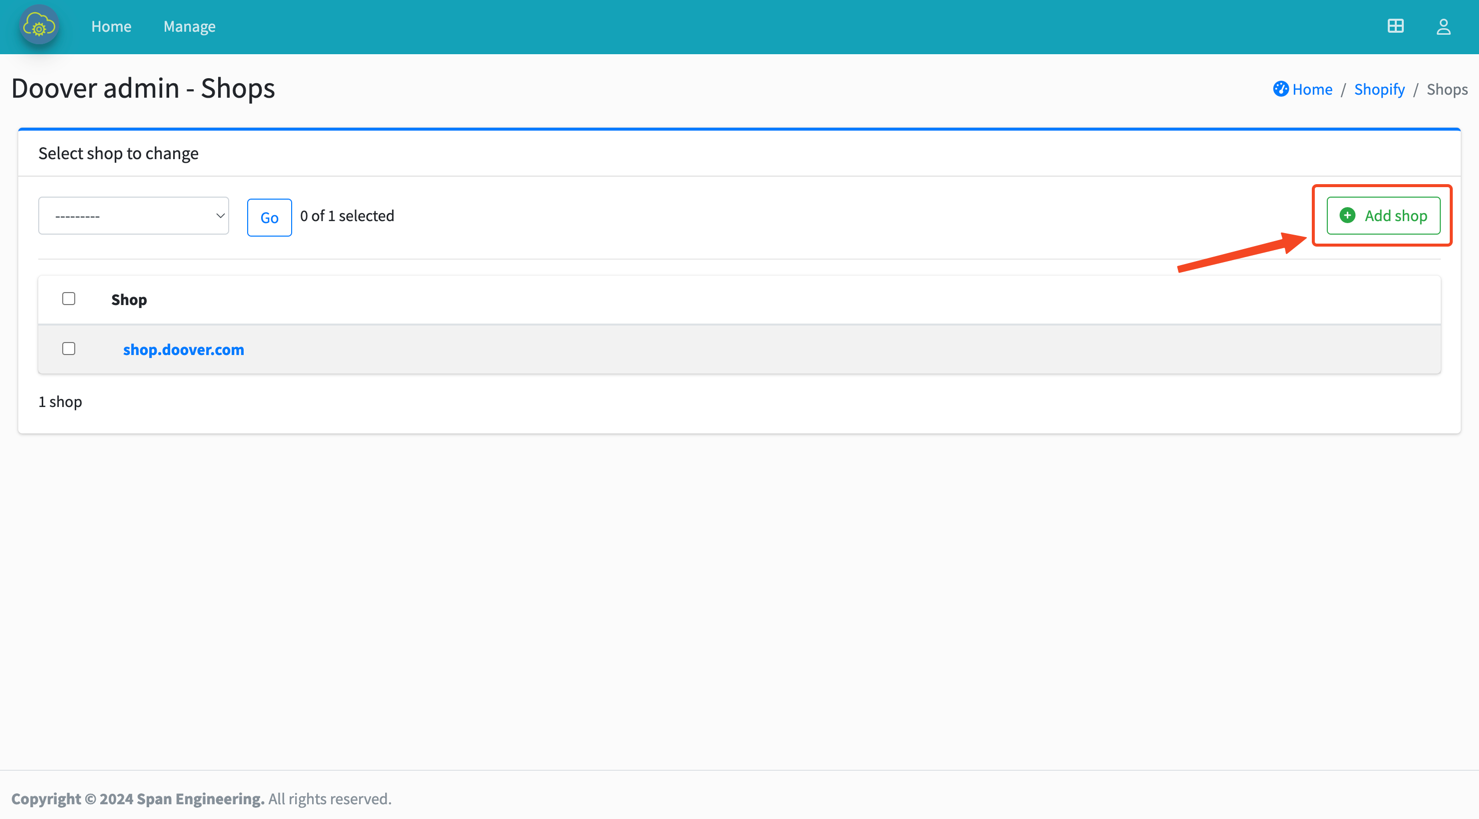
Step 6: Configure Doover
Now that we have our API tokens, webhook signing key and shopify domain we can configure the shop on the Doover site.
In the admin page, navigate to "Shops" and click "Add Shop".
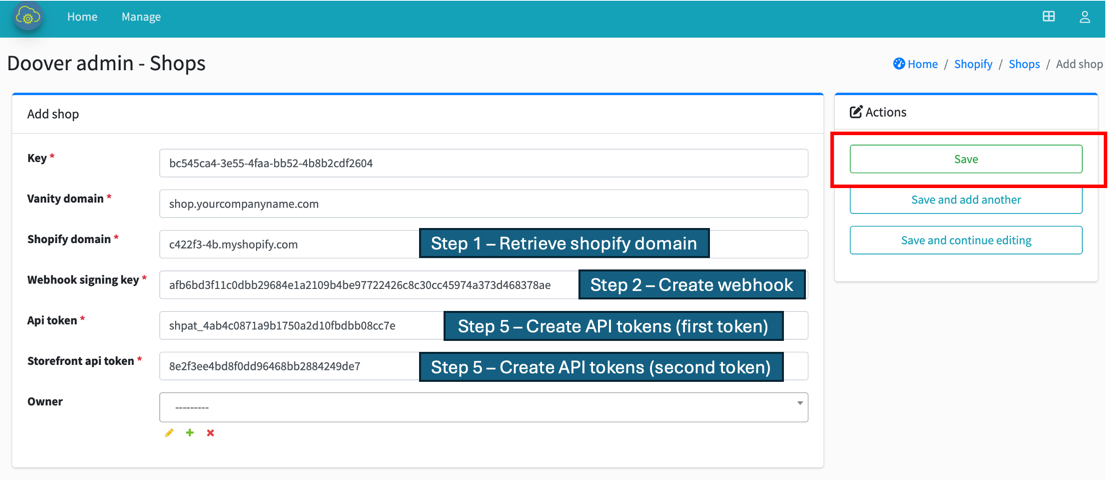
Enter the values you obtained from the Shopify app in the previous steps, and click "Save".
Next Steps
And that's it! Your Shopify store is now integrated with Doover. You can now configure product ads through the "Ads" admin page on the doover admin site.
We also suggest changing the email input box on the checkout page to specify that the email must match your Doover account, and setting up manual payments. See the manual payments and email title pages for more information.